Showing posts with label Easel card. Show all posts

Thursday, February 20, 2025

Here's to You!

 Hi Artzy friends -

Sometimes  a single image is all you need to make a "wow" card.  This image from Wine Between Friends was all I needed to create a birthday card that is appropriate for just about anyone.


An easel card is a quick and easy fun fold card that lends itself perfectly to showcasing a large focal point image like this one, and no dies are necessary!


Papers are from the Summer Breeze Paper Pack and the Countryside Floral collection.

An easel card stands up nicely on display and of course, I've included a spot inside for a personal greeting, using dies from Rectangle Framelits dies 


Thanks for visiting and have a great day!

Avra


Thursday, December 19, 2024

A Puppy For Christmas

 Hi Artzy friends -

Today I'm sharing my final Dare 2B Artzy holiday card for 2024, and I'm happy to say that this adorable puppy stamp set can also be used for birthdays all year round!

Cindy recently demonstrated how to make a new-to-me fun fold in her D2BA Facebook group that she called a "Tent Easel Fun Fold" and I had to give it a try!


This card is similar to a traditional easel card but it has additional flaps that give you lots of space for decorating with images or just pretty patterned papers.

I used images and sentiments from the Puppy Present stamp and die sets, as well as a combination of holiday papers from a few different years. The classic green/red/white plaid paper is from the current year's Winter Escape collection. 

This is what it looks like opened up flat. I added a little area to sign your name or write a little message. But you could also take advantage of the back side of the card to write a longer note. 


Here is the card standing up like an easel. I highly recommend following the Dare 2B Artzy FB page and catch the replay of Cindy's video to get more detailed information on creating this fun fold card!


Do you like learning and creating new fun folds like I do?

And - how would you feel about receiving a puppy for Christmas?!

Thanks for visiting and have a great day, a wonderful holiday, and a happy new year!

Avra


Tuesday, February 28, 2023

Growing in Unity, Day 2

 Happy Tuesday, friends!

Welcome to my 2nd day as a Growing in Unity gal for 2023!

Today's card is a stand up easel card. I love easel cards because they're simple to make, fold flat to fit in an A2 envelope, but can make a big impact when you stand them up for display.

I colored a sweet Angie Girl image called Lexi Girl with Copic markers. Angie Girls are a very popular line of stamps from Unity Stamp Co. You can check out the entire collection here.


I matted my trimmed image on black cardstock and attached it to my easel card base. 


I attached a panel of patterned paper to the inside of my card. I then stamped my sentiment and mounted it on black cardstock, and adhered it to the inside of my card using foam tape to act as a ledge for my easel card to stand up.


I embellished my card front with some pretty gold pearls from Pinkfresh Studio.


I hope you enjoyed today's card, and check out Unity's  huge collection of Angie Girls.
All of Unity's stamps are "cook to order" meaning they are manufactured and packaged as orders are placed, so you never have to worry about an "out of stock" situation! 

Don't forget to comment on this post, and each post this week, for a chance to win a $20 gift credit to Unity Stamp Co!

Thanks for visiting and have a great day!

Avra


Thursday, November 5, 2020

Reindeer Games with Dare 2B Artzy and Tombow

 Hi Artzy friends -

Today I have the pleasure of sharing with you some cards I created with a fun Dare 2B Artzy set, along with Tombow Dual Brush Pen Art Markers.

Be sure to check out the Dare 2B Artzy blog all this week for more inspiration using Tombow products. 


Because I am new to using Tombow markers, I wanted to try out various techniques with them. So - I made 4 cards! This will be a picture heavy post!

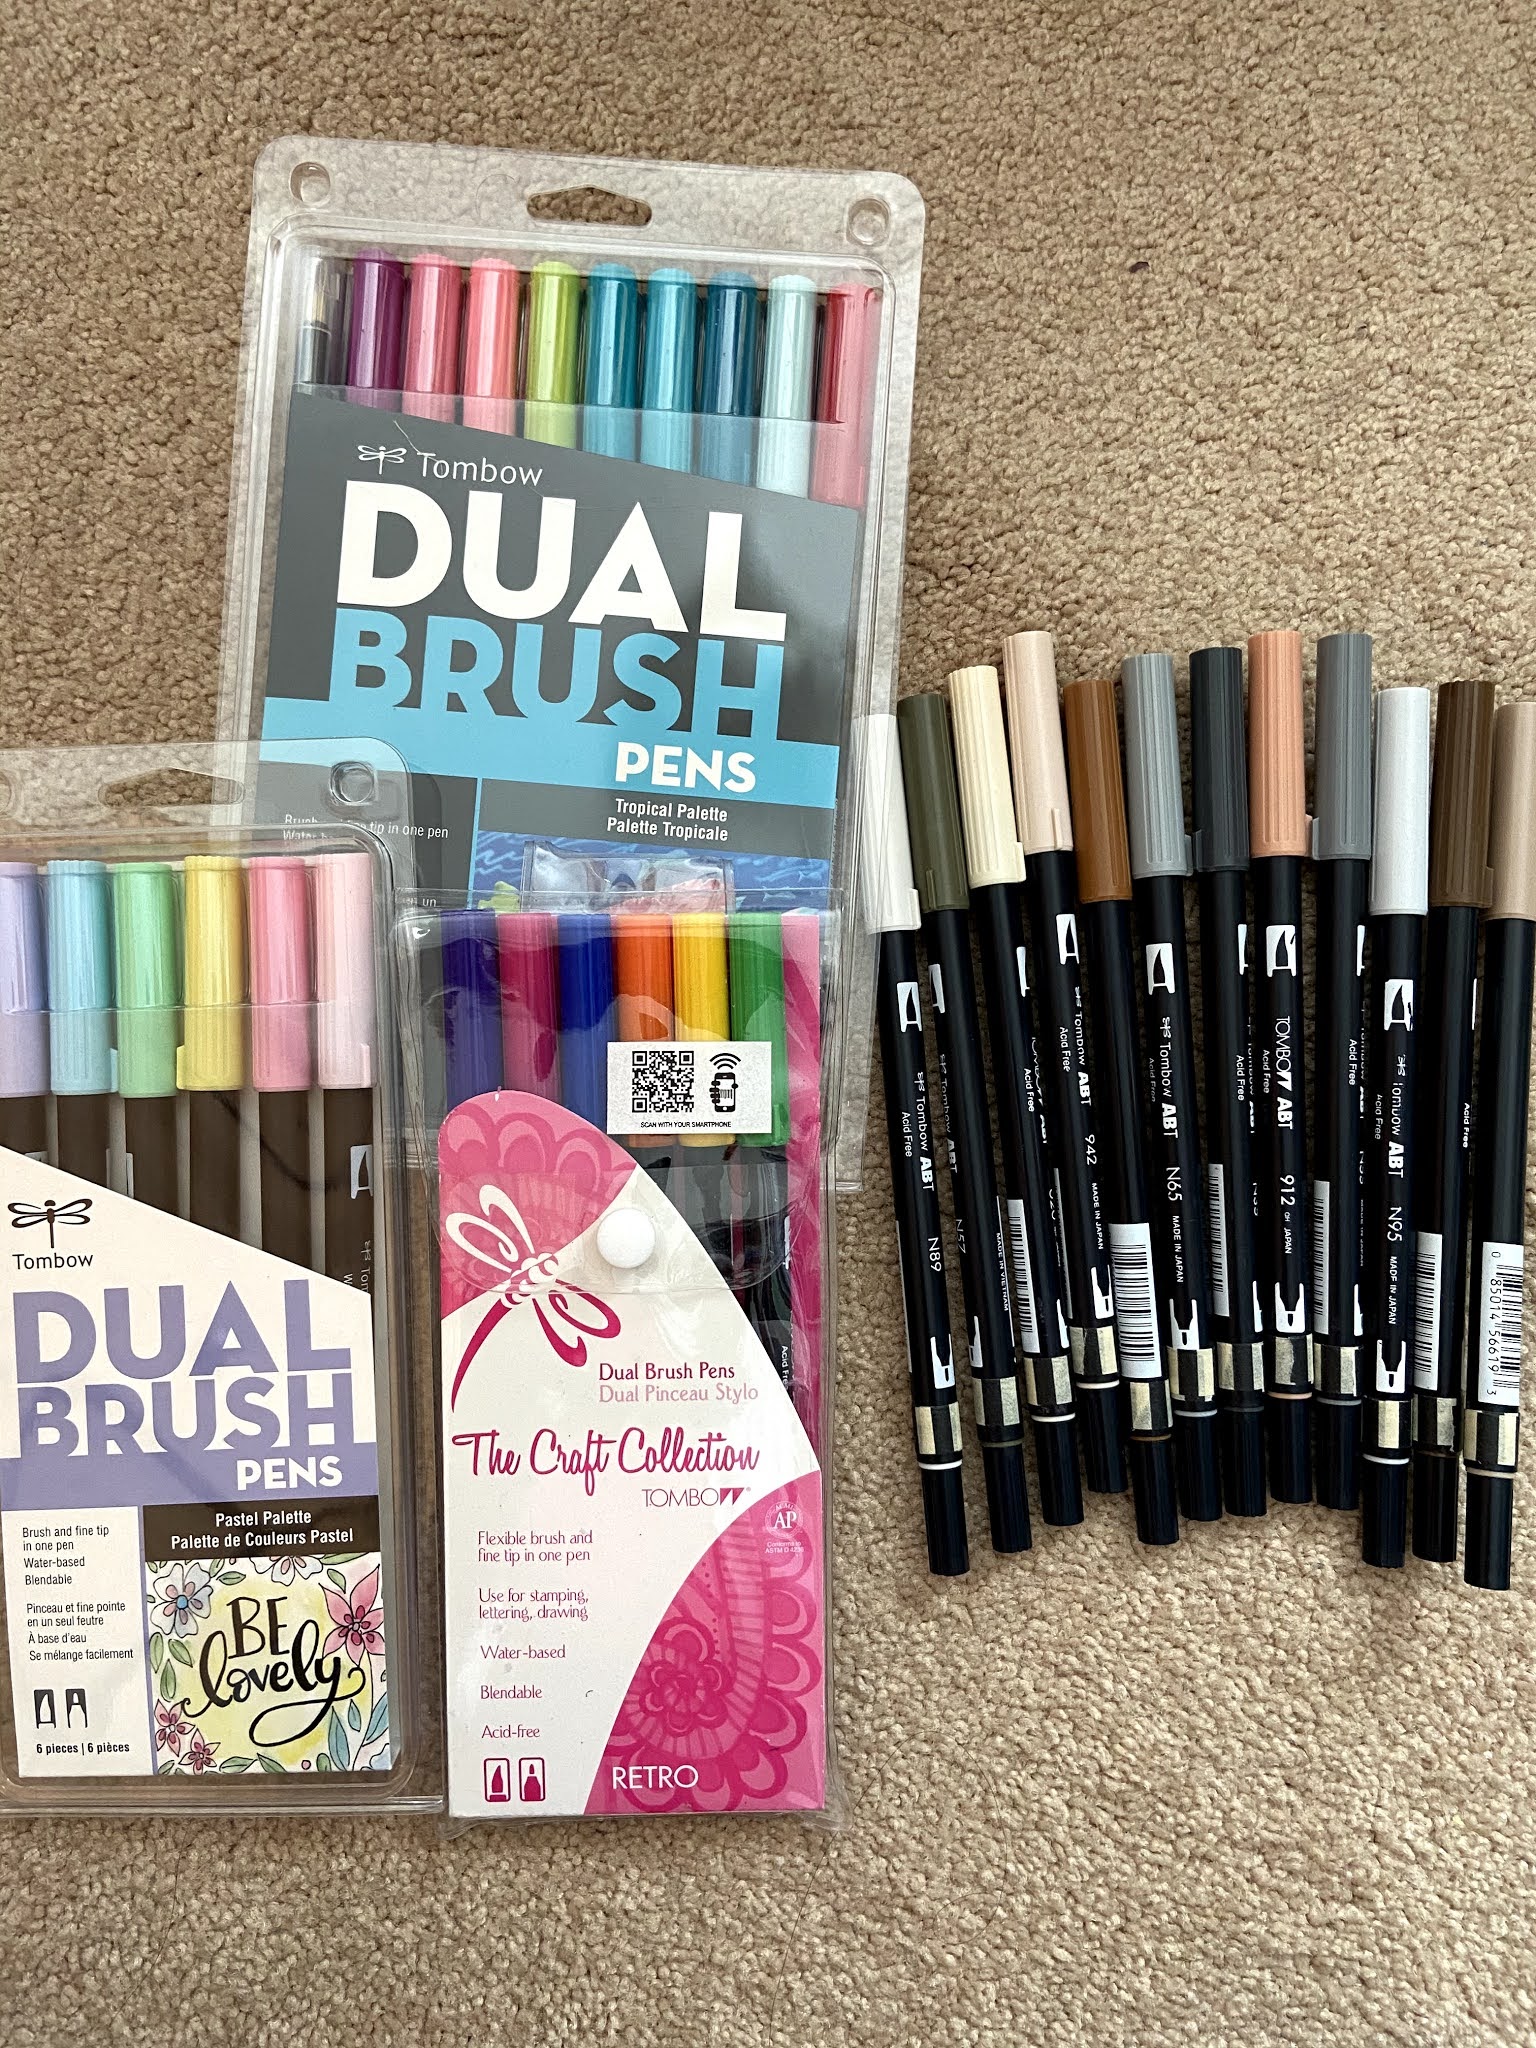
Here are the sets of markers I had to work with, along with some neutral colors that I borrowed from a friend. 

There are 108 colors of Dual Brush Pens in all, including a colorless blender.
Dual Brush Pens are a water based marker, with a brush tip and a fine point bullet tip.
They are great for coloring, doodling, journaling, hand lettering, and more. Learning hand lettering is on my "to-do" list sometime soon, and the brush tip is perfect for that!

Now on to my coloring! 
I wanted to choose an image with a lot of opportunity to color, so I chose the Reindeer Games stamp and die sets. This is a whimsical set with some cute sentiments to go with the images.
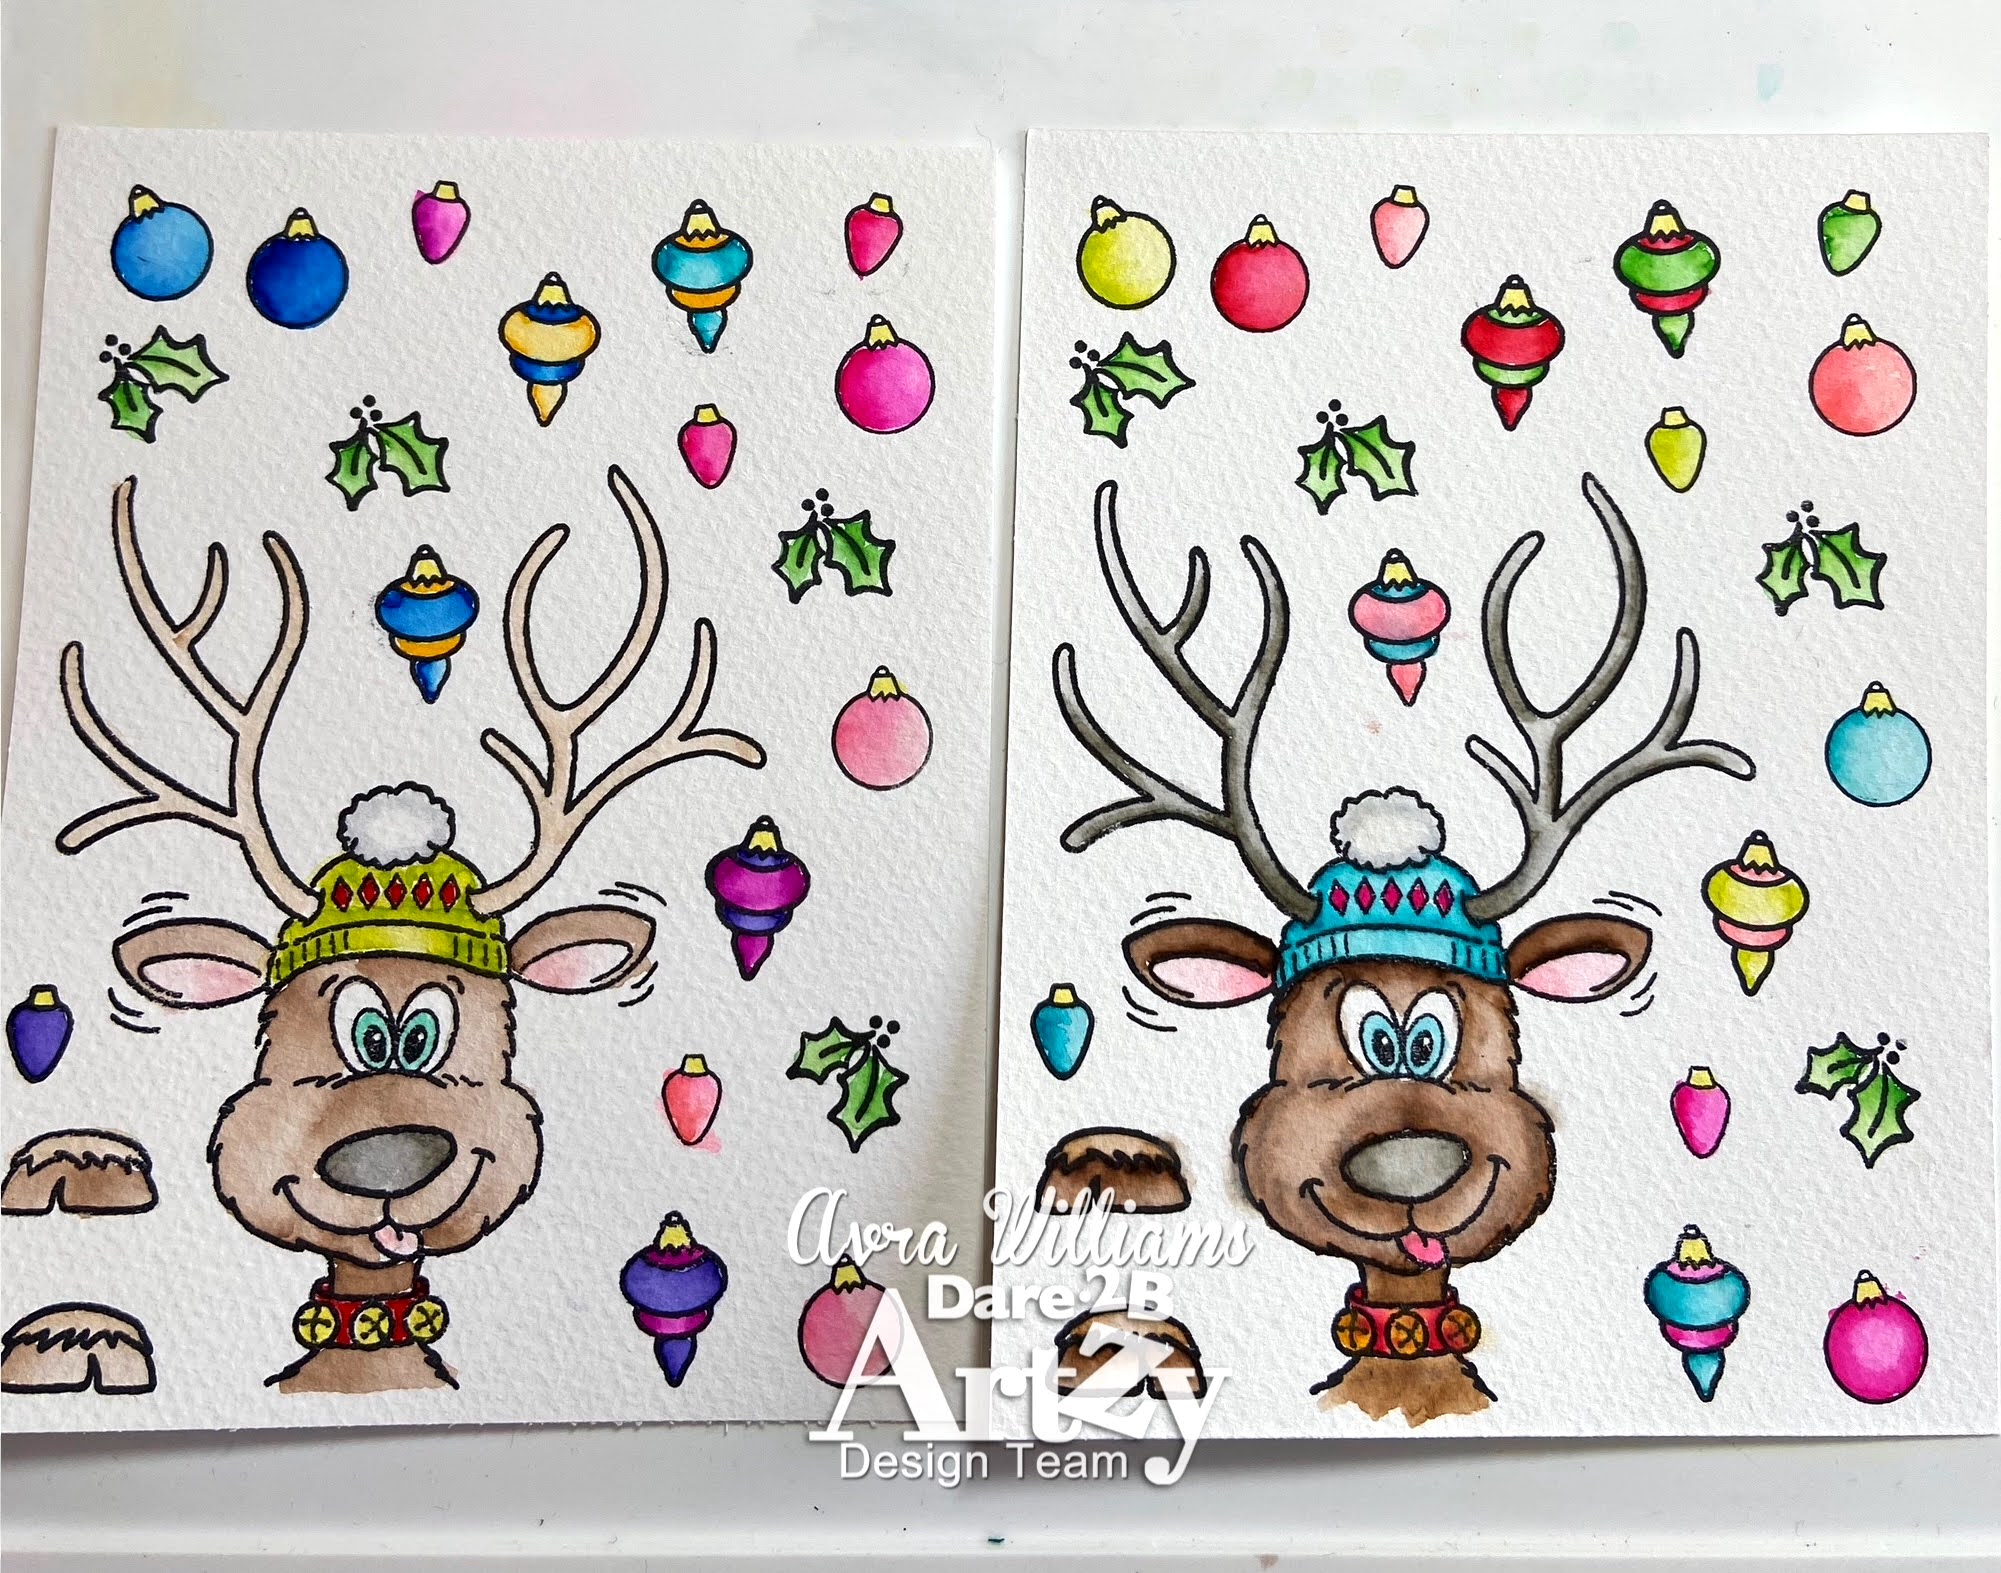
I stamped the main image, along with the ornaments, on both Bristol Smooth cardstock, and water color paper, using Versafine Clair ink in Nocturne, which is a quick drying, waterproof pigment ink. If you are in a hurry, you could dry it using a heat tool.

Here are the 4 panels of images I colored. I tried: coloring directly on the paper, then blending it out with a waterbrush, coloring directly on the paper, then blending it out with the colorless blender, and scribbling the marker onto a palette and picking it up with a waterbrush. As I mentioned earlier, I tried the techniques on 2 different types of paper. Coloring directly on the Bristol Smooth is preferred to coloring directly onto watercolor paper. Watercolor paper is better if you are adding more water, such as wetting the paper before applying the color.  The first 2 panels are Bristol Smooth; the second 2 are Canson Watercolor paper.


After die cutting all of my images, I added Glossy Accents to my ornaments. I love that the Glossy Accents did not alter the colors of the images. As I did not end up using many of them on these cards, they are ready for me to accent future holiday cards with. So shiny, dimensional, and fun!


Next I created some watercolored backgrounds for some of my cards.
I chose some pretty blues and greens and scribbled them on my craft mat. I then lightly misted the mat with water, and dipped my watercolor cardstock into the color. I continued to add color, add water, and dip and drag my panel through the colors until I was satisfied with the result, drying them with my heat tool in between layers. 


I ended up using 2 of the above backgrounds for 2 slimline cards, and I also created an A2 easel card and a square shaker card.

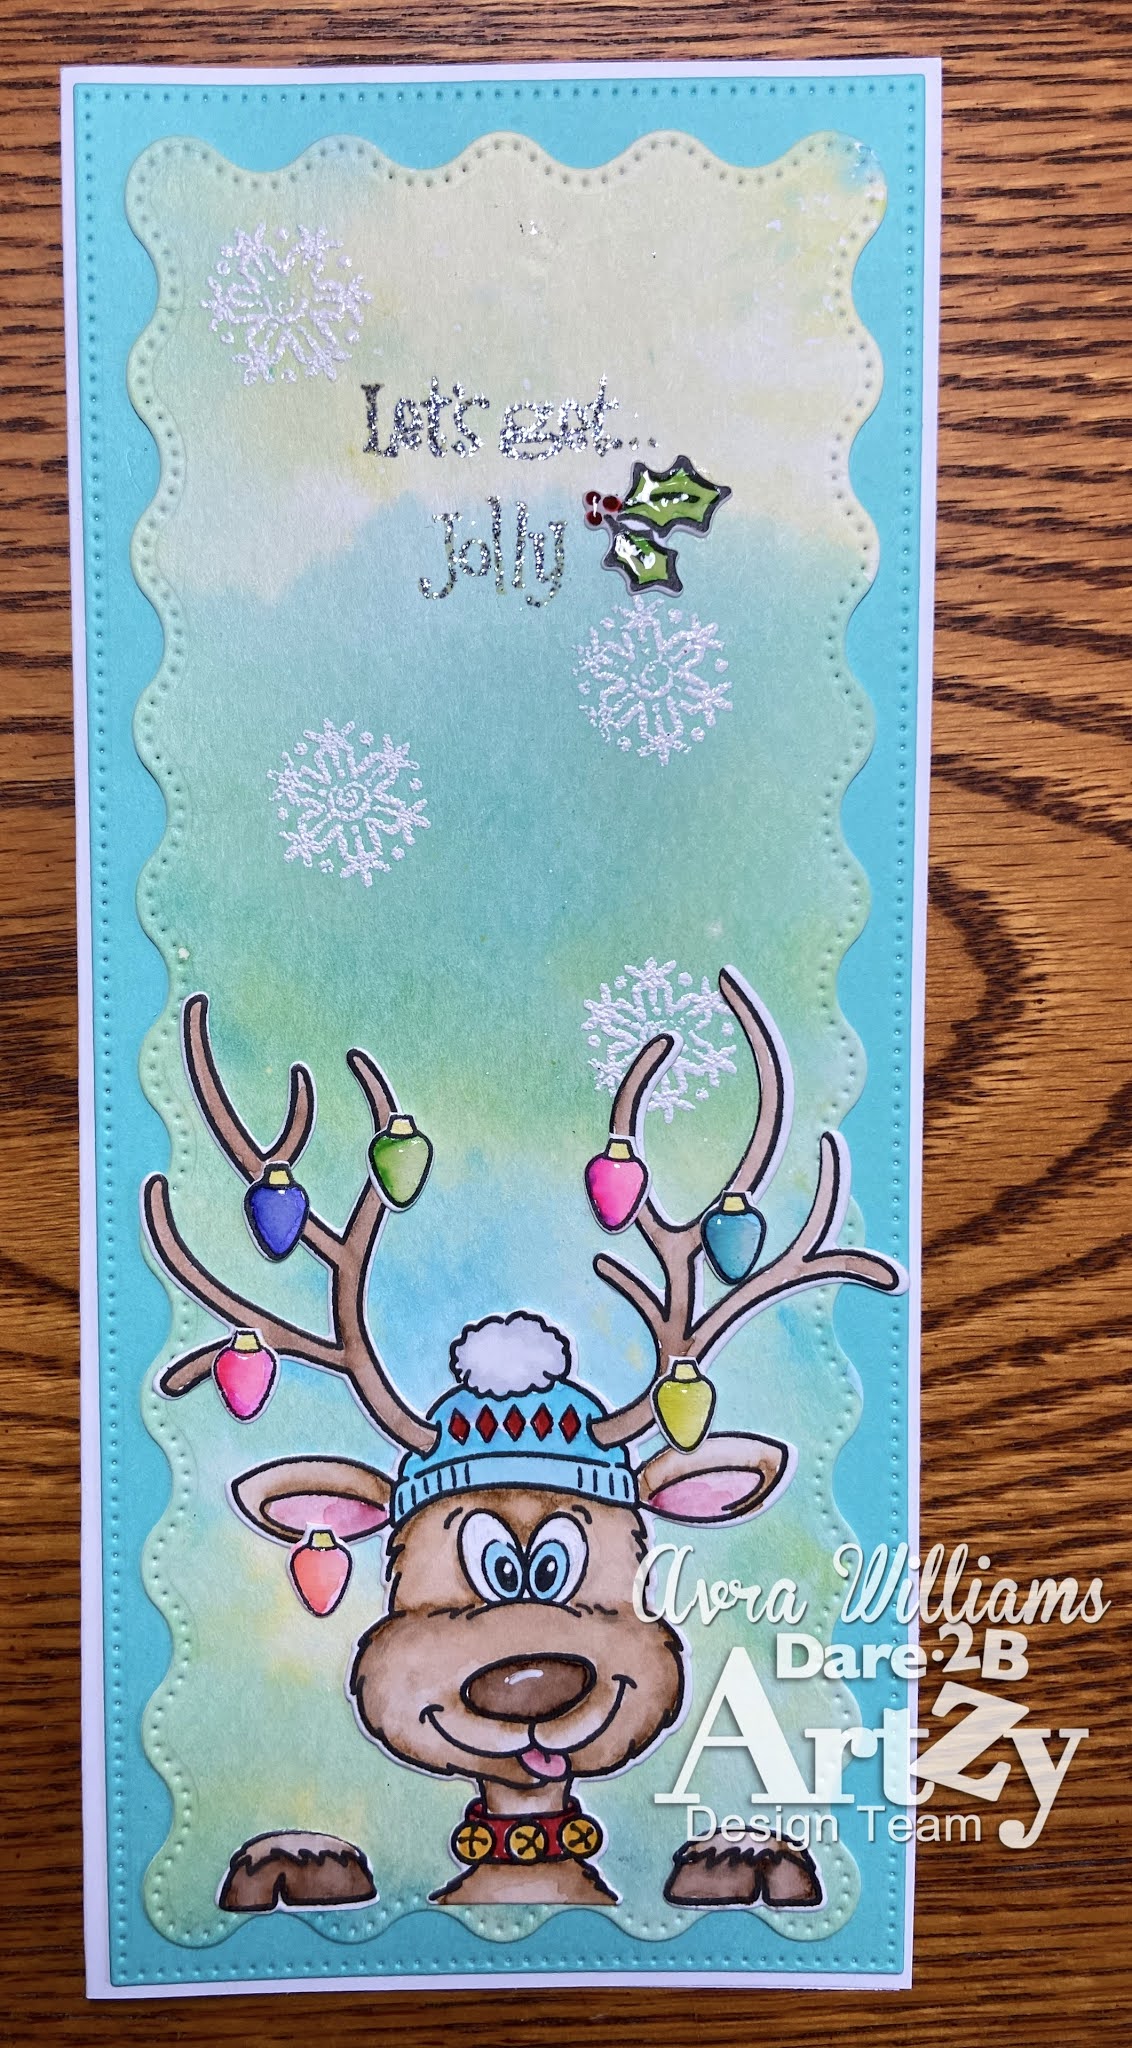
I cut down one of the backgrounds using the largest die in the Wavy Slimline Framelits die set, and adhered it to a 9" x 4" horizontal card base. I popped up my reindeer and his feet with foam tape. I added my heat embossed sentiment strip, also cut with a banner die in the Wavy Slimline Framelits set. I embellished the card with snowflakes from the Slimline Snowflake dies, an ornament from Reindeer Games, and some additional gems. 


For my 2nd slimline card, I cut a watercolored panel with a die from the Wavy Slimline Framelit dies, and also cut a piece of aqua colored cardstock from the largest die in the set. I heat embossed my sentiment, and a few snowflakes onto the water colored panel, both from Reindeer Games. I layered the two panels onto my 8 1/2" x 3 1/2" vertical card base. I adhered my reindeer, his feet, some light bulbs and holly with liquid glue. 


My next card is an easel card. On the front panel I cut a piece of white fun foam with the reindeer die to pop the image up on. Fun foam is an easy way to give a sturdier base to a detailed image than cutting little bits of foam tape. For the inside of the card I cut a label out twice with one of the Rectangle Fancy Framelit dies - once in white, and once in green. I cut off just the bottom third of my green shape and popped it up with two layers of foam tape onto the white piece to create a "lip" for my easel. I heat embossed my sentiment in gold, and added the reindeer's feet and a sprig of holly to finish off the card. The white label is where I will write my message and sign my card. 


Finally I created a 4 1/2" x 4 1/2" shaker card.
I glued my reindeer image down to a piece of pretty wintery paper from the Snow Much Fun collection, and adhered that to my card base. I then created a frame with a  Square Framelit die, and added a piece of acetate behind my frame. I popped that up onto my card front, leaving a small opening to add my sequins.  I then added foam tape to my opening making sure to close up all the gaps so my sequins couldn't escape. I added a sentiment from the Toboggan Fun stamp set, heat embossed in silver on vellum, and glued on a sparkly snowflake and the reindeer feet. 


I really enjoyed creating this assortment of holiday cards with Tombow markers, and the Reindeer Games stamps and dies, and other products from Dare 2B Artzy

We have a sale going on now at Dare 2B Artzy!
Use the code FALL10 to save 10% off all orders, now through November 8th!

Also - join our November challenge with a "Thankful" themed project, for a chance to win a $15 gift certificate!

Thank you for visiting, and have a great day!

Avra


Thursday, July 23, 2020

Bear Hugs

Hi Artzy friends!

For the past several weeks, Cindy Sartain, the owner of Dare 2B Artzy, has been  participating in online stamp and scrapbook events, and has also done weekly live videos on her Facebook group (Artzy Community.) During these videos she demos Dare 2B Artzy product, both new, and some items that have been around for a while. Her demos have inspired me to pull out some items that I may not have used recently, and create cards with them.

Today I am sharing two cards that I created with the Bear Hugs stamps and dies, as well as the Rectangle Fancy Framelit dies and the Fun Card Fold die.


The first card is a more "traditional" easel card. I love how the bears "stand up" on the card, and that the card also folds flat for mailing.


These adorable bears have their masks on and are social distancing, making them perfect to use on a card during this crazy time in our lives.


The next card is called a reverse easel card, created with the same dies and stamps.  


This card also folds flat for mailing, and the bears without their masks on can be used for a fun card any time! 


Both of these cards use beautiful papers from the All the Buzz collection

The entire Dare 2B Artzy product line can be found here

Our current challenge for this month is Christmas in July. You can enter your project here for a chance to win a $15 gift certificate to Dare 2B Artzy. 


Thanks for visiting and have a great day!

Avra

Thursday, April 23, 2020

Crafty Gnome Easel Card

Hello, Artzy friends!

Today I am sharing an easel card I created with the our new Dare 2B Artzy Crafty Gnome stamps.


The paper is from the Artzy Doodle collection.

She's got all of her supplies ready to spend a day crafting with her friends! Hopefully she will be able to do that soon! 


This card folds flat to fit in an A2 envelope.


Please check out all of the wonderful Dare 2B Artzy product here

And don't forget to enter our April challenge, Pastel Colors,  for a chance to win a Dare 2B Artzy gift card!

Thank you for visiting, and have a great (and crafty) day!

Avra