Hi Artzy friends -
Today I have the pleasure of sharing with you some cards I created with a fun Dare 2B Artzy set, along with Tombow Dual Brush Pen Art Markers.
Be sure to check out the Dare 2B Artzy blog all this week for more inspiration using Tombow products.
Because I am new to using Tombow markers, I wanted to try out various techniques with them. So - I made 4 cards! This will be a picture heavy post!
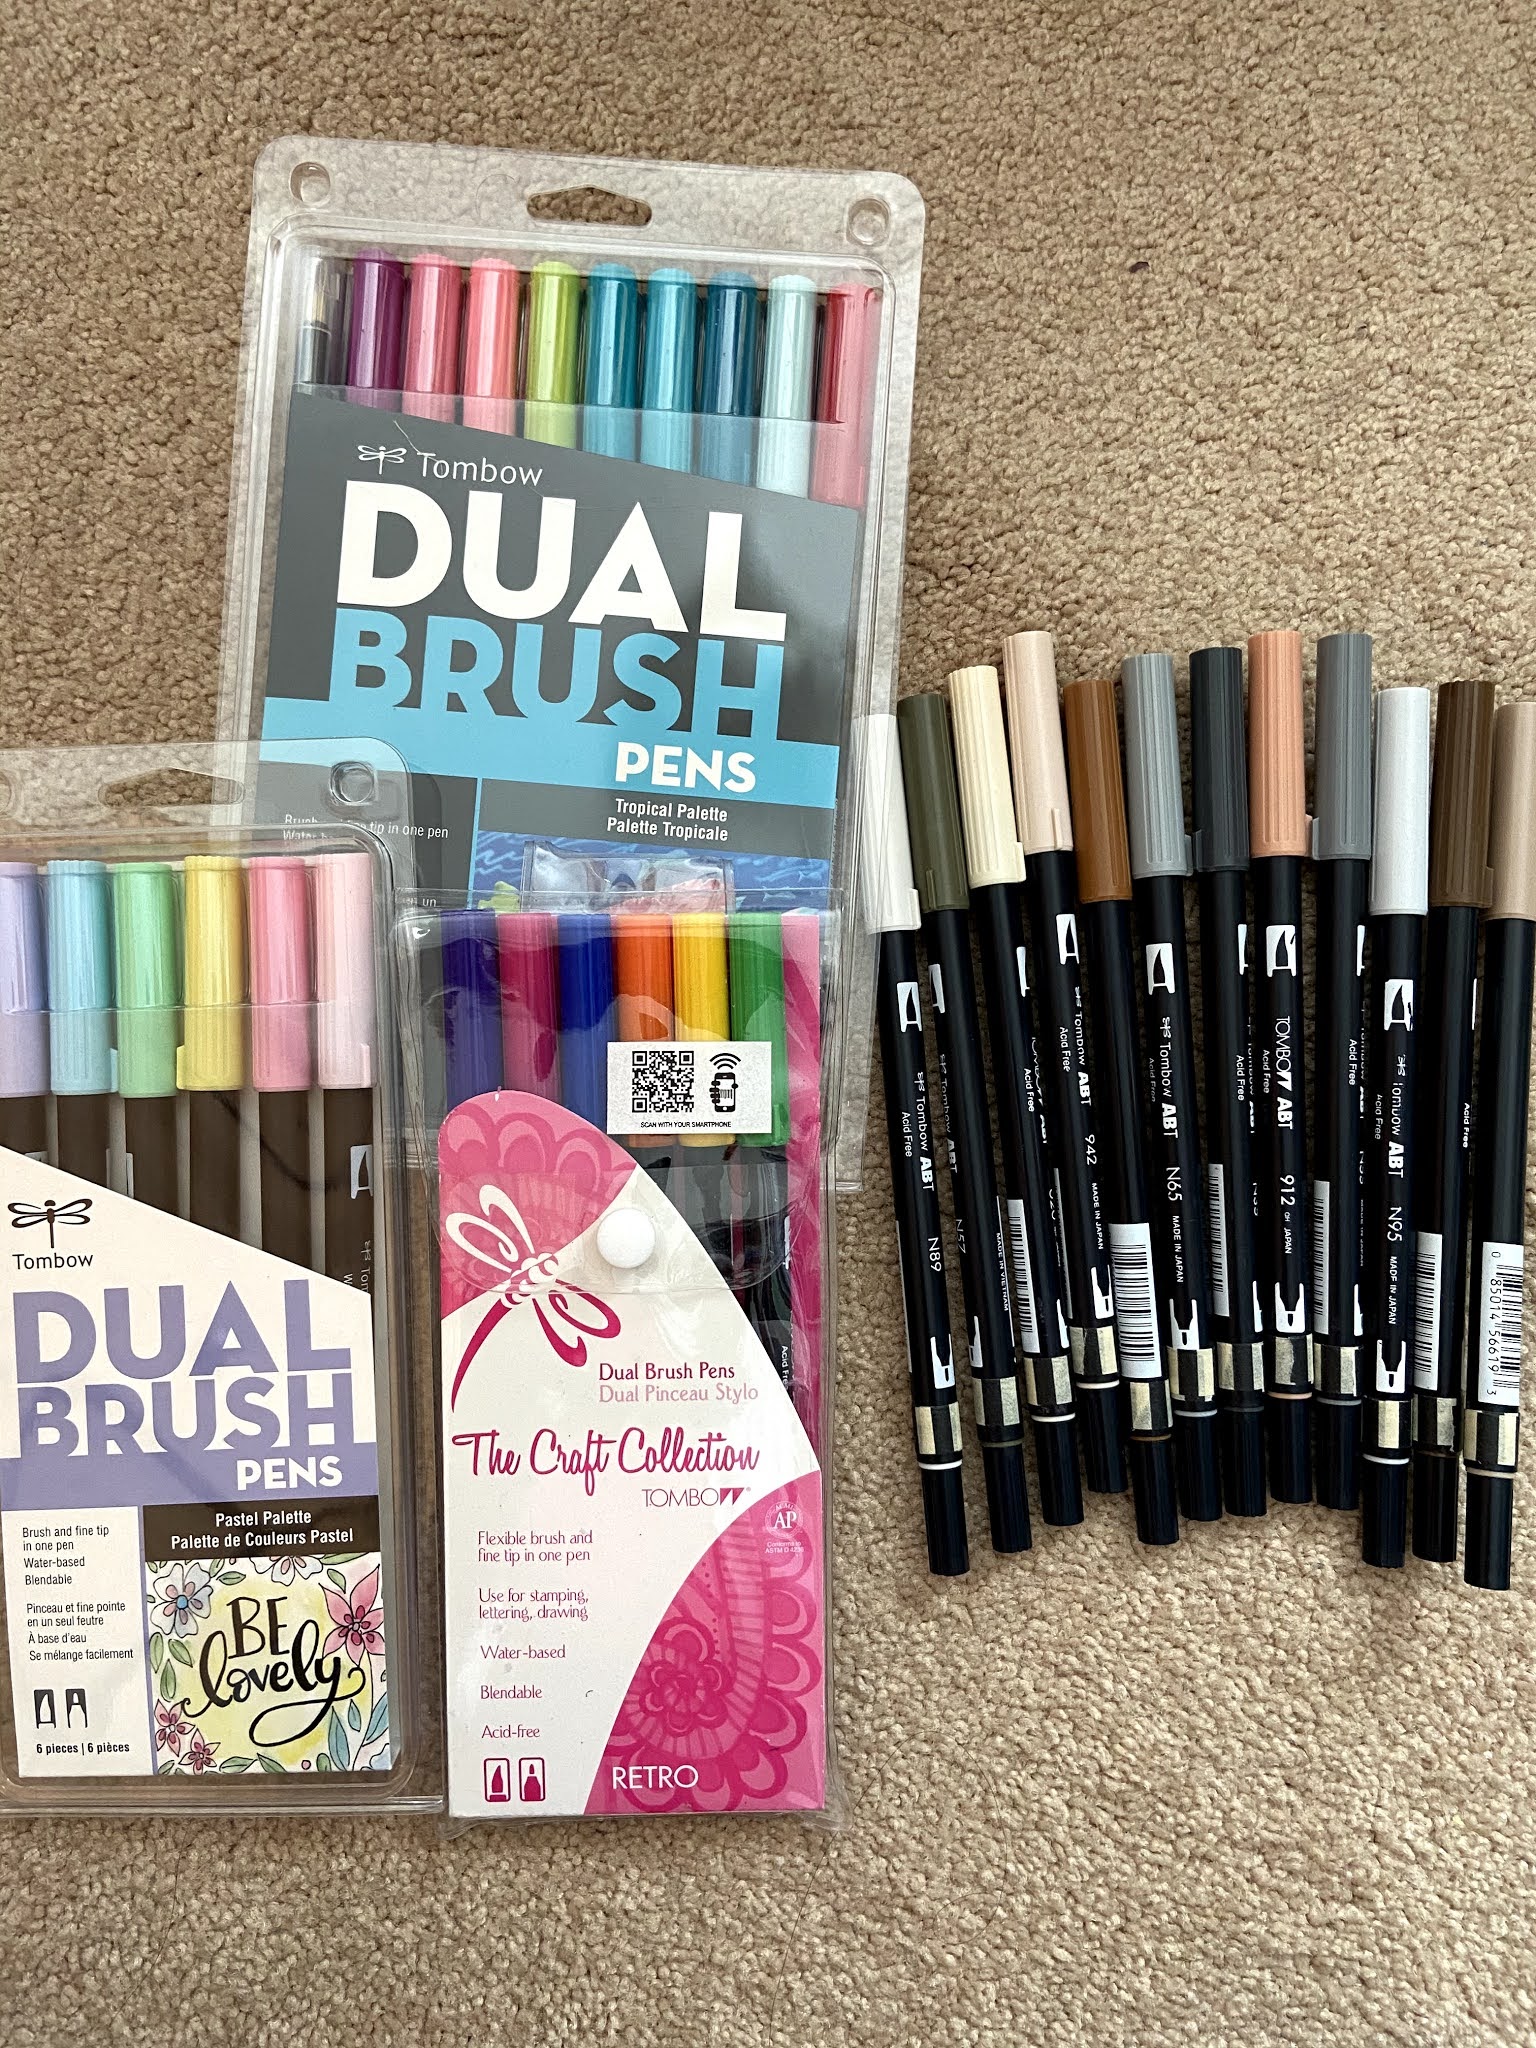
Here are the sets of markers I had to work with, along with some neutral colors that I borrowed from a friend.
There are 108 colors of Dual Brush Pens in all, including a colorless blender.
Dual Brush Pens are a water based marker, with a brush tip and a fine point bullet tip.
They are great for coloring, doodling, journaling, hand lettering, and more. Learning hand lettering is on my "to-do" list sometime soon, and the brush tip is perfect for that!
Now on to my coloring!
I wanted to choose an image with a lot of opportunity to color, so I chose the
Reindeer Games stamp and die sets. This is a whimsical set with some cute sentiments to go with the images.
I stamped the main image, along with the ornaments, on both Bristol Smooth cardstock, and water color paper, using Versafine Clair ink in Nocturne, which is a quick drying, waterproof pigment ink. If you are in a hurry, you could dry it using a heat tool.
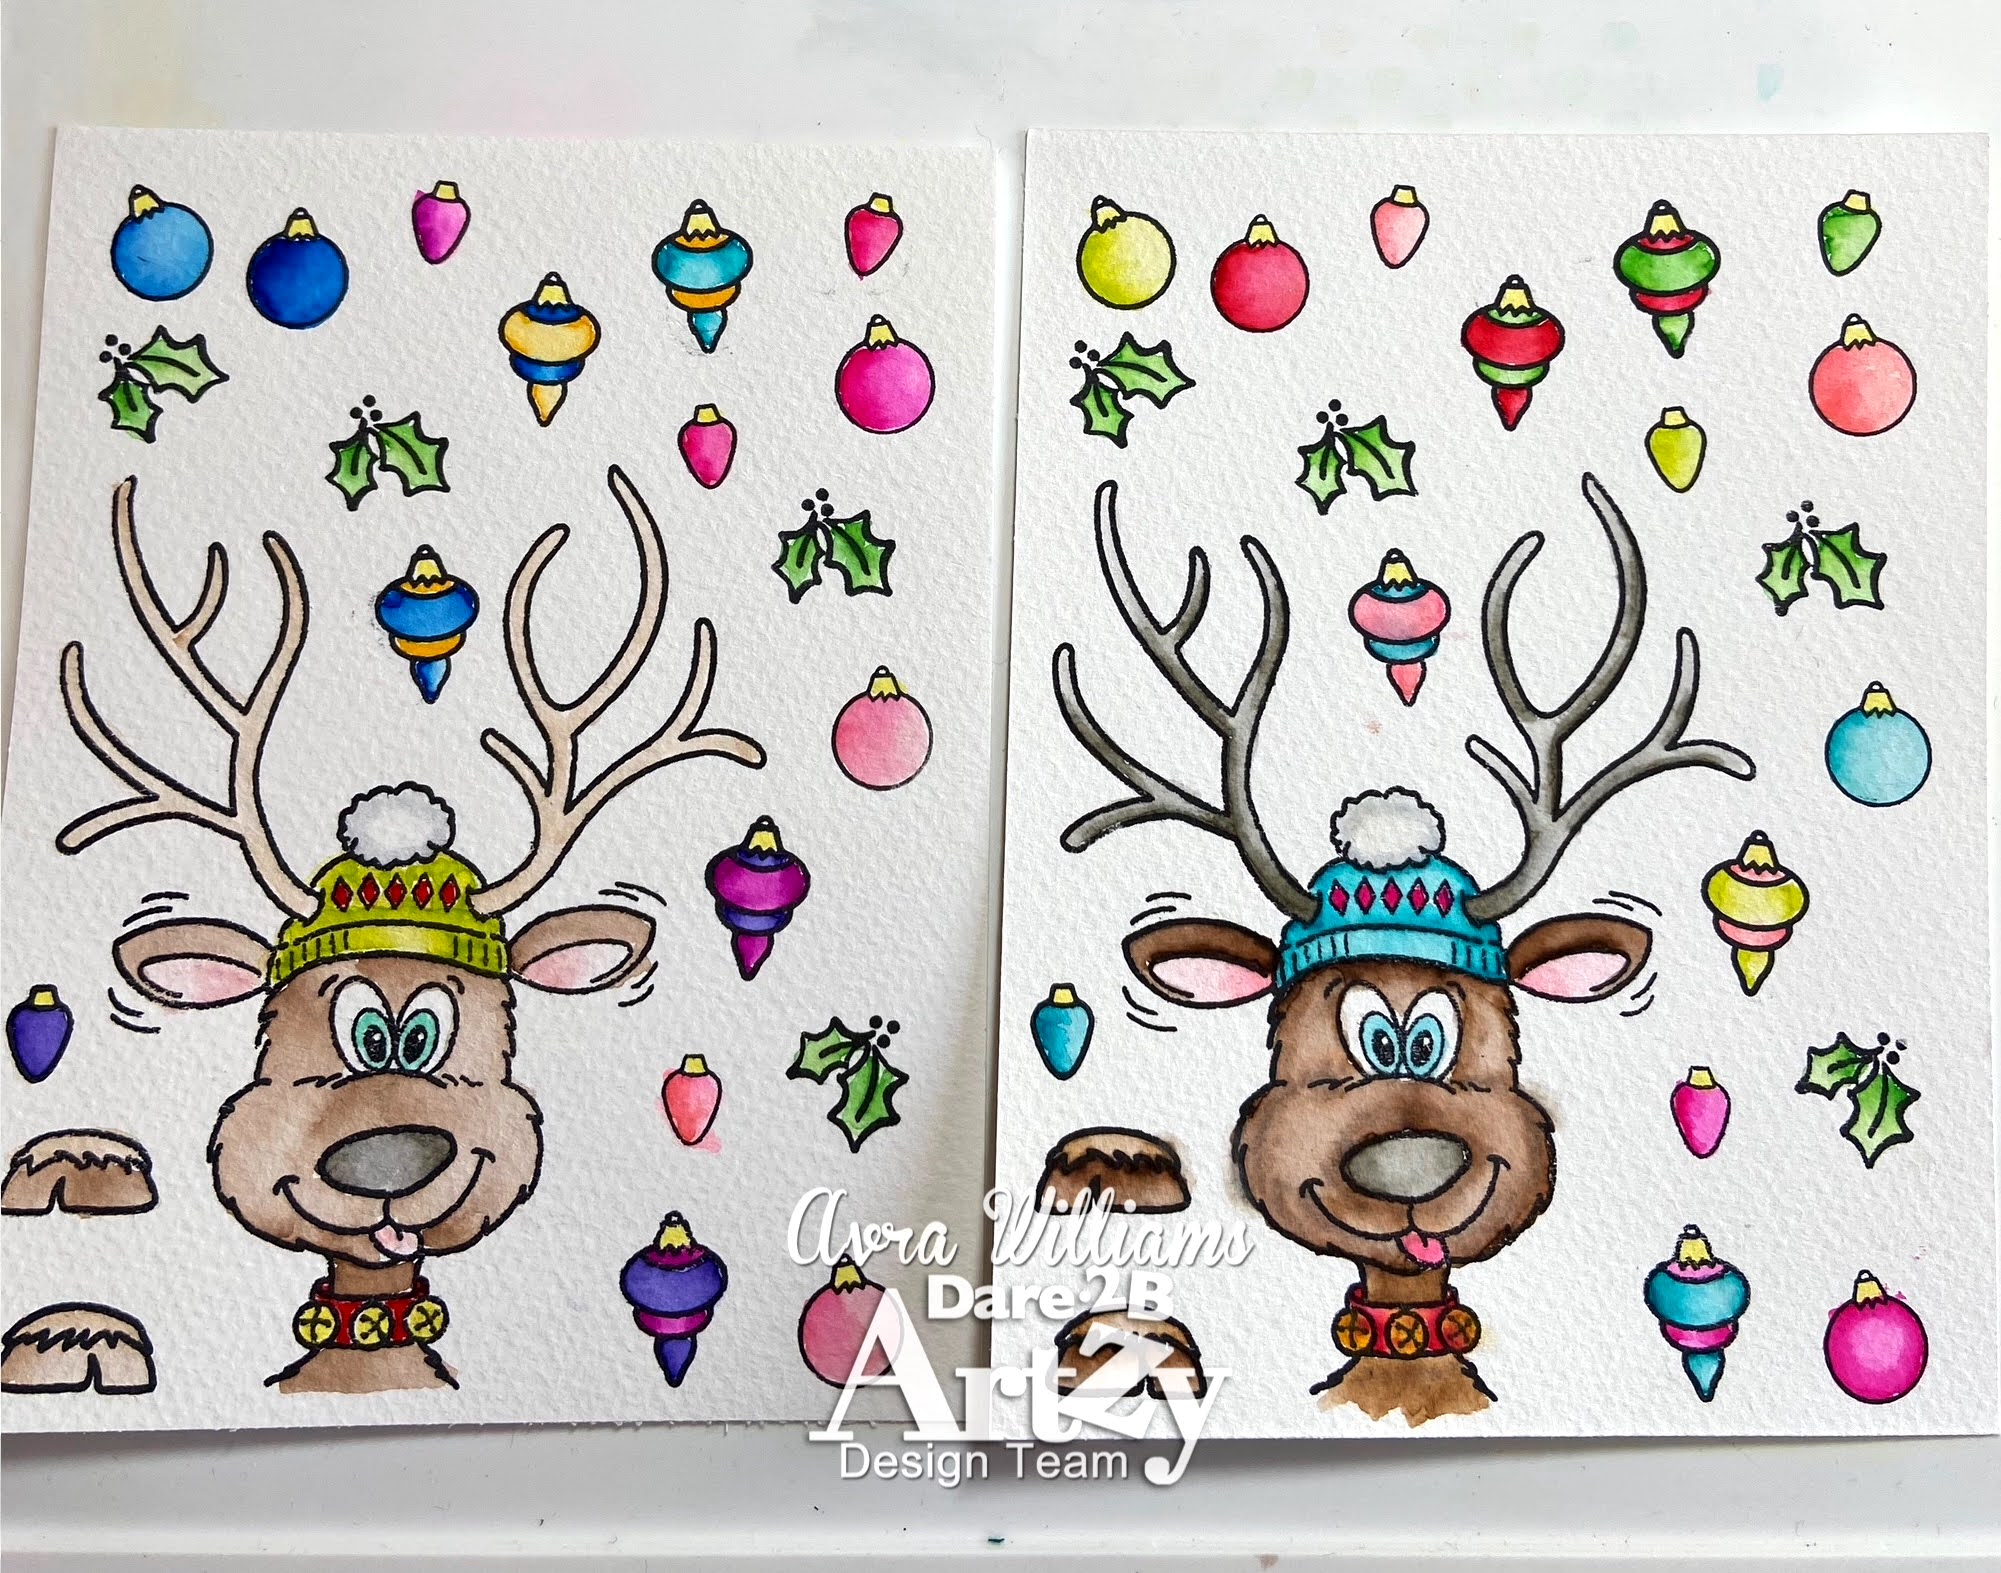
Here are the 4 panels of images I colored. I tried: coloring directly on the paper, then blending it out with a waterbrush, coloring directly on the paper, then blending it out with the colorless blender, and scribbling the marker onto a palette and picking it up with a waterbrush. As I mentioned earlier, I tried the techniques on 2 different types of paper. Coloring directly on the Bristol Smooth is preferred to coloring directly onto watercolor paper. Watercolor paper is better if you are adding more water, such as wetting the paper before applying the color. The first 2 panels are Bristol Smooth; the second 2 are Canson Watercolor paper.
After die cutting all of my images, I added Glossy Accents to my ornaments. I love that the Glossy Accents did not alter the colors of the images. As I did not end up using many of them on these cards, they are ready for me to accent future holiday cards with. So shiny, dimensional, and fun!
Next I created some watercolored backgrounds for some of my cards.
I chose some pretty blues and greens and scribbled them on my craft mat. I then lightly misted the mat with water, and dipped my watercolor cardstock into the color. I continued to add color, add water, and dip and drag my panel through the colors until I was satisfied with the result, drying them with my heat tool in between layers.
I ended up using 2 of the above backgrounds for 2 slimline cards, and I also created an A2 easel card and a square shaker card.
I cut down one of the backgrounds using the largest die in the
Wavy Slimline Framelits die set, and adhered it to a 9" x 4" horizontal card base. I popped up my reindeer and his feet with foam tape. I added my heat embossed sentiment strip, also cut with a banner die in the Wavy Slimline Framelits set. I embellished the card with snowflakes from the
Slimline Snowflake dies, an ornament from
Reindeer Games, and some additional gems.
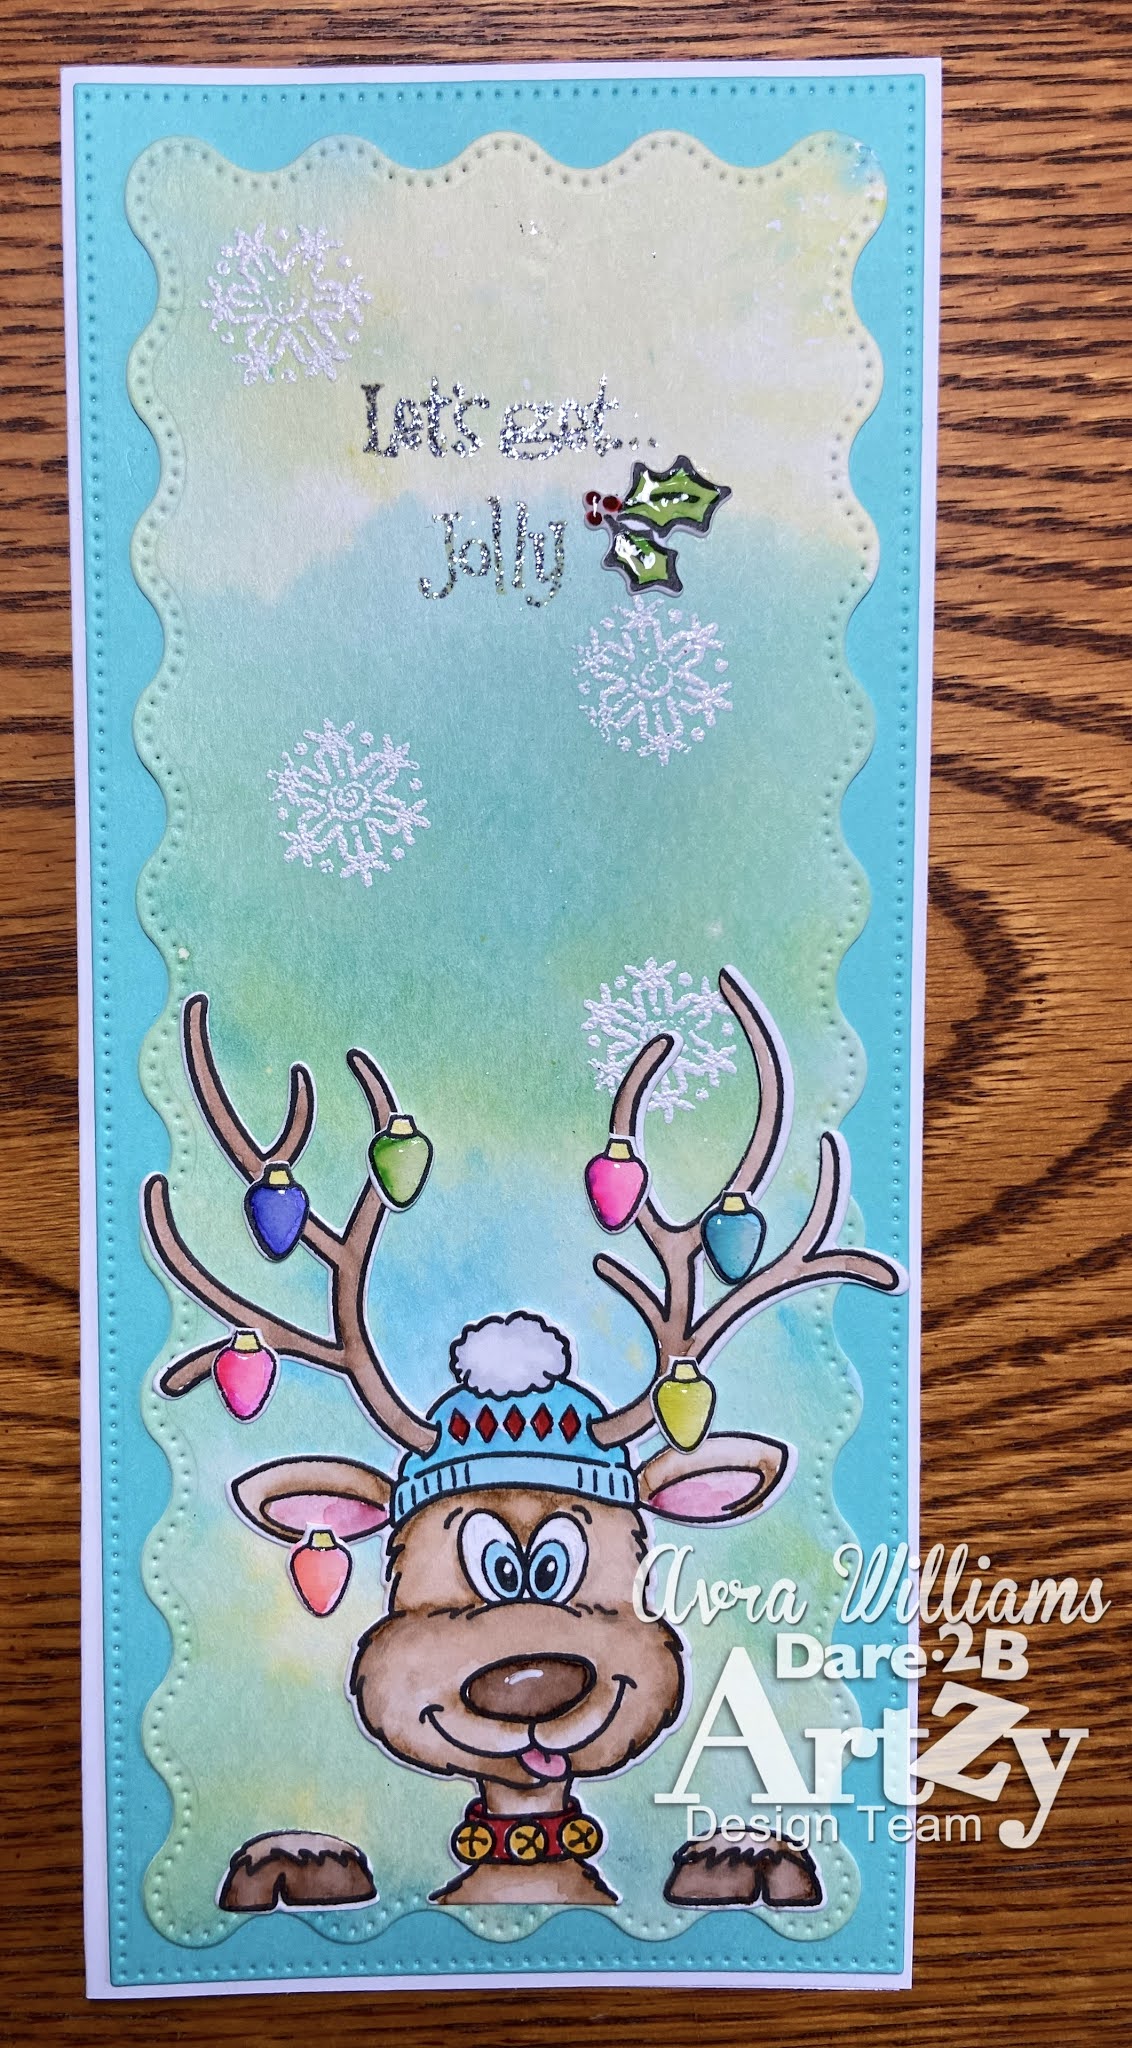
For my 2nd slimline card, I cut a watercolored panel with a die from the
Wavy Slimline Framelit dies, and also cut a piece of aqua colored cardstock from the largest die in the set. I heat embossed my sentiment, and a few snowflakes onto the water colored panel, both from
Reindeer Games. I layered the two panels onto my 8 1/2" x 3 1/2" vertical card base. I adhered my reindeer, his feet, some light bulbs and holly with liquid glue.

My next card is an easel card. On the front panel I cut a piece of white fun foam with the reindeer die to pop the image up on. Fun foam is an easy way to give a sturdier base to a detailed image than cutting little bits of foam tape. For the inside of the card I cut a label out twice with one of the
Rectangle Fancy Framelit dies - once in white, and once in green. I cut off just the bottom third of my green shape and popped it up with two layers of foam tape onto the white piece to create a "lip" for my easel. I heat embossed my sentiment in gold, and added the reindeer's feet and a sprig of holly to finish off the card. The white label is where I will write my message and sign my card.
Finally I created a 4 1/2" x 4 1/2" shaker card.
I glued my reindeer image down to a piece of pretty wintery paper from the
Snow Much Fun collection, and adhered that to my card base. I then created a frame with a
Square Framelit die, and added a piece of acetate behind my frame. I popped that up onto my card front, leaving a small opening to add my sequins. I then added foam tape to my opening making sure to close up all the gaps so my sequins couldn't escape. I added a sentiment from the
Toboggan Fun stamp set, heat embossed in silver on vellum, and glued on a sparkly snowflake and the reindeer feet.
I really enjoyed creating this assortment of holiday cards with
Tombow markers, and the Reindeer Games stamps and dies, and other products from
Dare 2B Artzy!
We have a sale going on now at Dare 2B Artzy!
Use the code FALL10 to save 10% off all orders, now through November 8th!
Also - join our
November challenge with a "Thankful" themed project, for a chance to win a $15 gift certificate!
Thank you for visiting, and have a great day!
Avra
.jpeg)

.jpeg)
.jpeg)