Showing posts with label Seas the Day. Show all posts

Thursday, April 24, 2025

Artzy Clubhouse - April 2025

 Hi Artzy friends -

April's Clubhouse set is here and it's making me long for summer days on the beach!

I created this beachy card using images and a sentiment from the new stamp and die set called Beach Life. The "shellabrate" sentiment is from the older Seas the Day stamp set. 

 For the background I used a stencil from the Circle Duo Stencils to create the illusion of ocean waves. And I created a sandy beach with Brutus Monroe's Sand Castle embossing powder.


Be sure to check out all of the summer themed Dare 2B Artzy products for all of your upcoming summer card giving occasions!

Thanks for visiting and have a great day!

Avra


Thursday, August 5, 2021

Summertime Friends

 Hi Artzy friends -

Now that (Christmas in) July is over, I am holding on to a little bit of summer with this ocean friends slimline card.


The adorable manatees and the octopus are from the Seas the Day stamps and dies sets.

I cut the 3 background layers with dies from the Rectangle Slimline Framelits set and the Wavy Slimline Framelits set. The blue bubble patterned layer and the red and white striped strip,  (adhered on the inside edge),  are from the Otterly Awesome paper, in the Seas the Day collection. I just love everything in this collection for summertime themed cards!


I thought by adding the word "friends" to my card, I will be able to use this card for so many occasions, by simply adding the appropriate sentiment or note to the inside before mailing. The word stamp is one of 17 individual words in the new A Single Greeting stamp set! They can mixed and matched, or used individually, on all of your cards or scrapbook pages!


Enjoy these last weeks of summer - I know I will!

Thanks for visiting and have a great day!

Avra


Thursday, July 15, 2021

Bold Happy Birthday

 Hi Artzy friends -

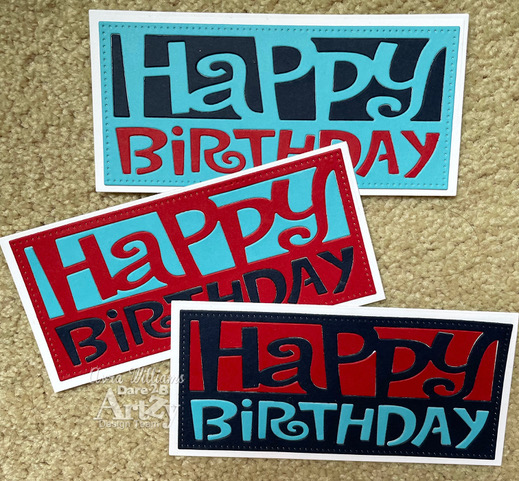
 I am always looking for quick easy ways to beef up my stash of birthday cards, so today I have 4 cards to share with you, all created with the same die. The die I used was the Slim Mini Birthday die, but I created 3 A2 cards and a slimline card!


To create my A2 cards, I cut the Happy Birthday die out of three different colors of cardstock. I saved all the pieces as I poked them out of the die so I could inlay them back into the other colored die cuts. It was then super easy to create 3 colorful Happy Birthday elements all at once!


These can then be used on just about any size card - mini slimline, slimline, or A2 being the most common sizes that come to mind.

I created three simple A2 cards that I'll be able to use for any birthdays that come along.
First I mounted one to a matching teal background, and added "to you" stamped beneath it, along with 3 red gems.


For the next one I attached my happy birthday to the center of a piece of paper from the Seas the Day collection.


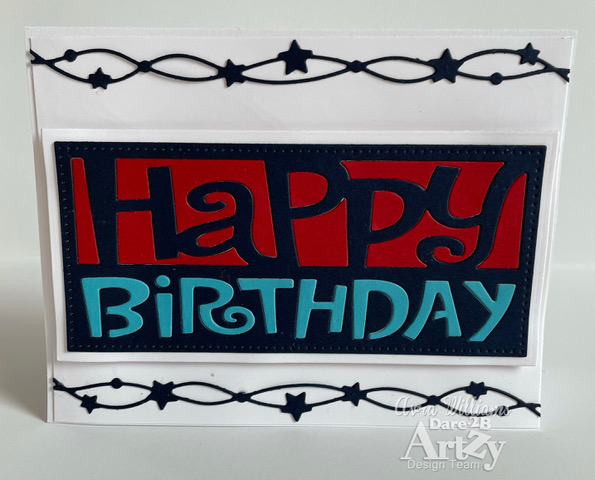
For the next card I mounted the happy birthday in the center of a white card base, and embellished it with the new Mini Stars Border die. 


After completing these 3 coordinating cards, I decided to get a little crazy and create a slimline shaker card.


This time, I cut the Slim Mini Birthday die out of white cardstock and created a shaker element, filling the Happy with blue sequins, and the Birthday with orange sequins. 


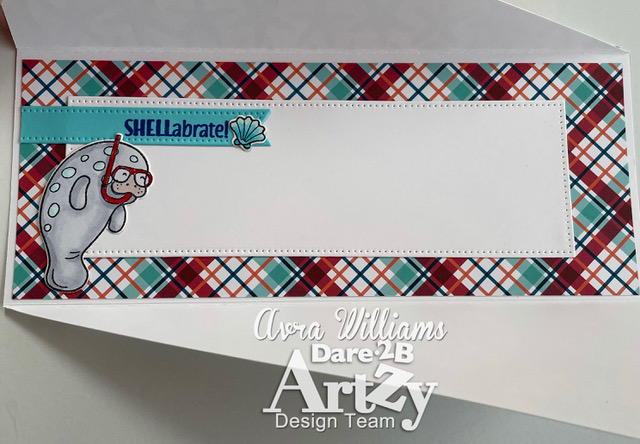
I then cut the two background layers for my slimline card using dies from the Wavy Slimline Framelit dies. The wavy frame is cut from paper from the Ice Cream Social collection. I love the fun colors and patterns and the shaker element on this slimline card!

I hope you've been inspired to think of different ways to use your dies, and to create lots of birthday cards to have on hand! 

If you'd prefer to get a jump on your holiday cards, please join us for our Christmas in July challenge for a chance to win a $15 gift certificate to the Dare 2B Artzy store!


Thanks for visiting and have a great day!

Avra


Thursday, May 20, 2021

Triangle Gatefold, Two Ways

 Hi Artzy friends -

Did you know that Cindy Sartain goes live on Facebook on the Dare 2B Artzy page almost every Monday at 7:30 p.m. Central Time? Her video is always full of great inspiration and tips (and sometimes sneak peeks) using fabulous Dare 2B Artzy products! 

If you watched on May 3rd, you saw her share how she makes triangle gatefold cards; and she shared the written dimensions and assembly directions in the Artzy Community Facebook group. Request to join the group if you are not already a member. You can find the measurements in the files. 


Because I love trying new-to-me fun folds, I created two triangle gatefold cards - a slimline version, and a mini-slim version. 

My slimline card features images from the Seas the Day stamps and dies sets, as well as paper from the Seas the Day collection. 


On the inside I adhered the white dotted rectangle and the sentiment strip from the Wavy Slimline Framelits die set.


I created a belly band to hold the card closed, mounting my octopus and stamping my sentiment on two diecuts from the Wavy Squares Framelits.


My mini-slim card features images from the Crafty Gnome stamp and die sets, and paper from the All the Buzz collection. 


On the inside I used the new Slim Mini Wavy Layers dies to cut the two layers on which my sentiment and additional images are displayed. 


I created a belly band for this card as well, again using the Wavy Squares Framelits for my main image and greeting. 


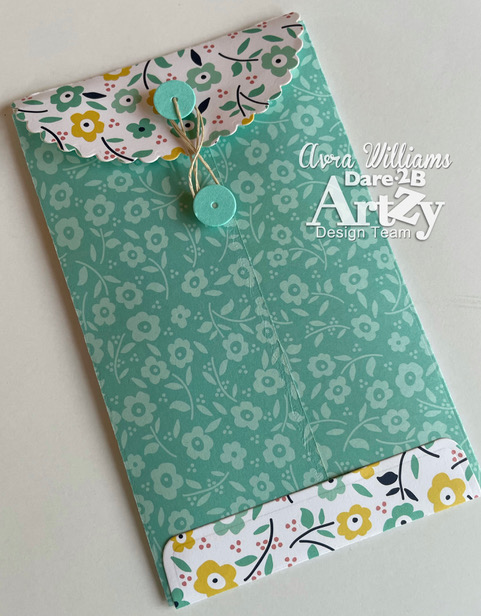
I also created my own matching slim-mini envelope with papers from the All the Buzz collection, using Dare 2B Artzy's brand new Slim-Mini Envelope dies! 


Don't you love presenting a card/gift that's all color coordinated?!


I hope you will tune in to Cindy's Facebook live's on Monday evenings, and if you can't watch her live you can always catch the replay any time!

There is still time to enter Dare 2B Artzy's challenge for the month of May. The theme is Flowers, and you can earn a chance to win a $15 gift certificate to the Dare 2B Artzy store. 


Thanks for visiting and have a great day!

Avra


Thursday, December 10, 2020

Gift Giving Time!

 Hi Artzy friends-

It's that time of year! It's time to make and send cards, shop, bake, wrap, and present gifts from the heart to our loved ones. What better way to present so many types of gifts than with an adorable box/backpack that you create yourself and personalize with your own creativity?!


I have made four of these backpacks now, and my most recent one is definitely the best, so I will share some little tips that I have learned along the way. 

Cindy, the owner of Dare 2B Artzy, has done an amazing job printing step by step assembly instructions on the die packaging, as well as provided a video tutorial for you visual learners. She has also shared many examples of backpacks she has created. My observations are just my opinions, and things that worked well for me. When you get this die, I recommend you make your first one following along with the video or printed directions, and using paper that you don't "care about" until you find what works best for you.

Here is my favorite of the four that I've made.


I chose to create this one without the backpack straps, and it's still equally as cute and useful. 
In my opinion, the backpack version is adorable and unique, and is perfect when paired with an appropriately sized teddy bear or other stuffed toy to present to a child (or adult!). But, for my purposes, I prefer to make the box without the straps. It makes a "neater" more compact presentation, and for me, has less room for error during the "construction process." 

Here are two examples of boxes I made with the backpack straps. It really is a clever design!


Here are my "two-cents" in addition to all of the tips provided on the packaging and in the video:
1)  I like to cut my main panels - front, back and sides, as well as the top, from a nice weight solid cardstock. I then cover the front, back, and sides with panels cut out of my chosen patterned papers and the dies provided. It provides quite a bit more structure and stability to the finish product. I used papers from the Snow Much Fun collection for my two holiday examples, and the SEAS the Day collection for my more summer themed backpack.


2) My other big tip won't necessarily work best for everyone, but I am a liquid glue girl. I know many of you prefer scor-tape, or other double sided tape when creating 3D objects. I tried scor-tape on my first two attempts at making these boxes. Like scor-tape, the right liquid glue (I use Art Glitter Glue) gives me a strong hold, dries fairly quickly, and can be applied to a small area. But it is much more forgiving than double sided tape in that it provides a little "wiggle room", or time to get my pieces lined up perfectly before I press them firmly into place. Like I said, it's a personal preference, but it's what works for me.

3) The only other additional tip I have is if you're making the backpack straps, use a really good quality cardstock. I'm not sure what the difference was, but the navy blue straps I made turned out really nice. The lighter blue ones got creased in a few places. It was probably just me, not being careful enough, but a nice heavy smooth cardstock will be easier to work with.

There are lots of gifts you can tuck inside this roomy box/backpack. It's the perfect size for a set of A2 cards. I plan to do this for my mother-in-law, once I can actually travel to take it to her. It will also hold candy and treats of all kinds, which is what I will fill this one with to give to my husband this Christmas. 


I made a little tag with the Rectangle Fancy Framelit dies that can tuck into the adorable front pocket. The Happy Holidays sentiment is from the Toboggan Fun stamp set.


Now that I've made a box that I love, and know how to get good results, I can't wait to make more!
You can find the Backpack die, as well as all of the fantastic Dare 2B Artzy products here. 

Please join our challenge this month here, by uploading a Holiday Fun themed card for a chance to win a $15 gift certificate!


Thanks for visiting and have a great day!

Avra